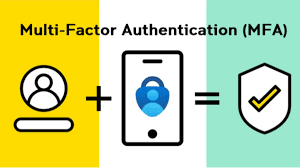
Enable a Virtual MFA Device for an IAM User (Console)
To Enable a Virtual MFA Device for an IAM User (Console)
- Firstly, just like the others, you have to sign-in to the AWS Management Console and open the IAM console at https:// console.aws.amazon.com/iam/.
- Then, choose Users in the navigation pane.
- You have to select a username for the intended MFA user in the User Name list.
- Select the Security Credentials tab and then Manage next to the Assigned MFA Device.
- Choose Virtual MFA Device and then Continue, in the Manage MFA Device Wizard.
- Now open your virtual MFA app.
- Determine whether the MFA app supports QR codes or not and then perform the following actions-
- Choose Show QR code from the wizard, and then use the app to scan it.
- Now, choose Show Secret key in the Manage MFA Device wizard, and the type it into your MFA app.
8. Now, inside the MFA Code 1 box in the Manage MFA Device wizard, type the OTP occurred in the virtual MFA device. After that you can type the second OTP (after waiting for at least 30 seconds) in the MFA Code 2 box. Now, choose Assign MFA.
To Configure & Enable a Virtual MFA Device for Use with your Root User (Console)
- Sign-in to the AWS Management Console.
- Now, choose your account name and My Security Credentials on the right side of the navigation bar. You can also choose Continue to Security Credentials (if required) and then expand the MFA section of the page.
- Choose Activate MFA.
- After that, you can select Virtual MFA device, and then Continue in the wizard.
- Open the virtual MFA app in the device.
- It's way more easier to configure the app by using it to scan the QR code. However, if it doesn't work, you can always manually type the configuration information.
- Enter the first six-digit number displayed by the MFA device of the Manage MFA Device wizard in the MFA Code1 box. The next number can be entered in the MFA Code 2 box after waiting for at least 30 seconds.
- Now, you can select Assign MFA, and then Finish.


Comments
Post a Comment